Creating a Torn Paper Effect in Image Tricks 3
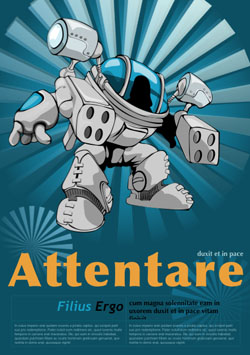
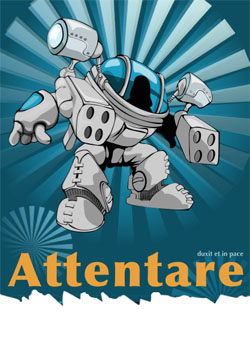
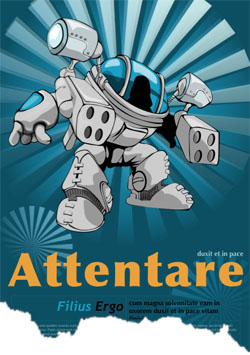
These pictures present the original image and what we are going to create:
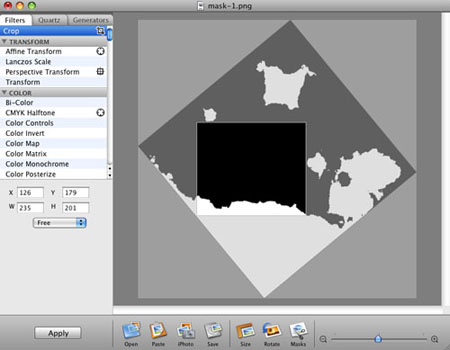
To achieve the desired effect, we'll apply a mask to the original image. The mask is the basis of the method described below. You can use the author's masks mask-1 and mask-2 (free and with no restrictions). Or create a unique mask from scratch following the tutorial below.
Requirements to the mask:
- Aspect ratio should be similar to the aspect ratio of the image you will modify. Otherwise, the mask may be distorted.
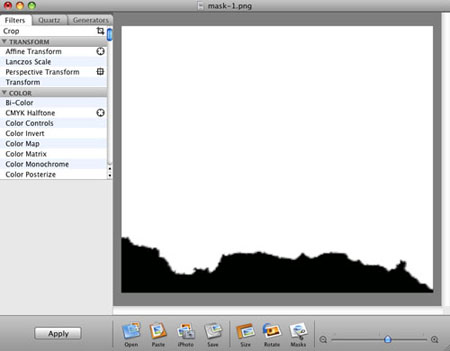
- The colors should be only black and white with no transparency. The black corresponds to the removed part of the paper sheet. To swap black and white, use the Invert filter.
- Open your image in Image Tricks.
- Select the Blend With Mask filter.
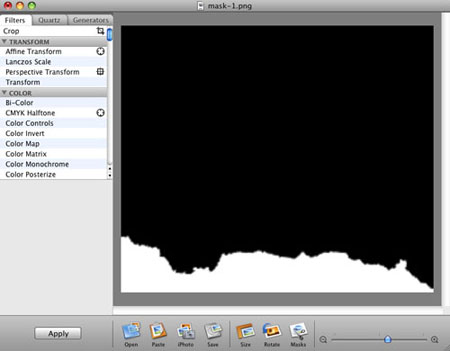
- Click the Open... button next to Mask Image box and select a graphic file — the mask. We are using mask-1.png for this example.
- Choose the background for the removed part of the page. Your choice may depend on how you plan to use the final image. To make the background transparent, click in the Background Image thumbnail and select a completely transparent image (the second). To have white or colored background, create an image of this color, and select it using the Open... button.
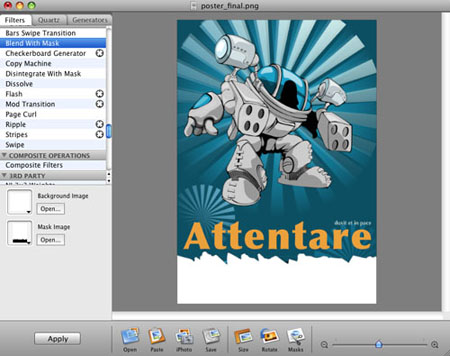
- Use the Crop tool if you wish to remove the blank part of your image.
For better results:
- To create a mask, prefer a noise-type tool such as described below, special brushes, or filters like Crystallize. With a mask drawn in a graphic editor using simple brush or erase tools, the final image looks less “natural”. A simple brush was used to create mask-1. A noise-type generator was used to create mask-2.
- If you plan to add several torn paper sheets in your design, use different masks for each of them. Your artwork will look more professional.
Creating an Unique Mask
If you cannot find an appropriate mask, or you are aware the copyright issues, you can create your own mask using Image Tricks.
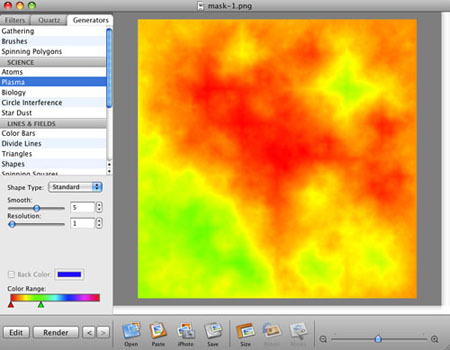
- Open Generators (Cmd-3). Click the Size button in the toolbar and set the image size 800 x 800 pixels (or larger since we'll use only a part of a generated image).
- Select the generator Plasma. The default parameters will work fine for us: Shape Type — Standard, Smooth — 5, Resolution — 1.
We need to have one or two large spots of one color over other color. Click the Render button several times to create several images. Then choose one using the “history” buttons “<” and “>”.
Don't be too enthusiastic. At this stage, you can hardly predict if one generated image is better than others. Just pick the first one and don't bother your head.
- Click Edit to proceed with the further steps. It is only in Image Tricks Pro. In the standard version, you don't have this button. This won't stop you. Save your image and re-open in Image Tricks.
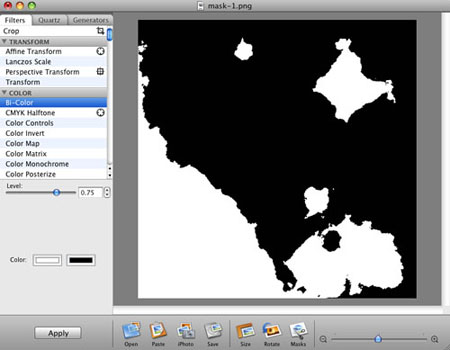
- Select the Bi-Color filter. Examine the image. To create a mask, we need to have a border between black and white colors that is more or less straight. Make sure that there are no “islands” near the border.
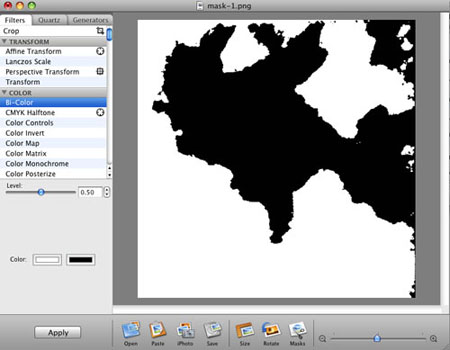
Move the Level slider slowly until you see a perfect border. If your result isn't satisfactory, return to generators (step 2) to create a new image.
In our example, the selected area is a bit curvy.
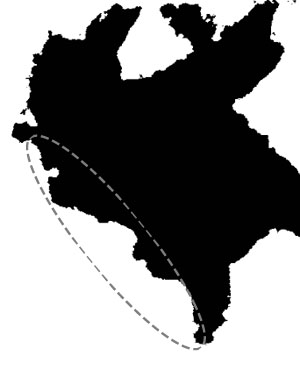 Varying Level, we can find a better shape.
 Click Apply.
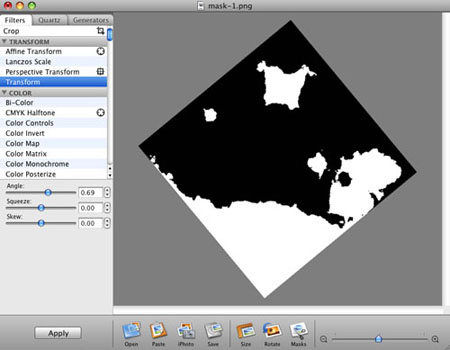
 - If necessary, rotate the image using the Transform tool. In many designs the bottom of the page is torn out.
- Choose the Crop tool and select a part of an image so that the selection includes a small part of one color and the rest of the other. Don't include “islands”.
 Click Apply.
- The black part of the mask will define the area in the image that will be removed. So, the major part of the mask we are creating should be white. If it isn't, apply the Invert filter.
- Adjust the size and proportion of a new mask using the Crop tool or Image Size dialog (Tools > Change Size). If you apply a horizontal mask to a vertical image or vice versa, the mask may stretch or squeeze. You should consider this.
- Save your mask. It is ready to use.
Nick Shubin
Published: April 2010