Restoring Files from Backups
The Restore dialog contains the restoration options. To open it, click the Restore button in the main window.
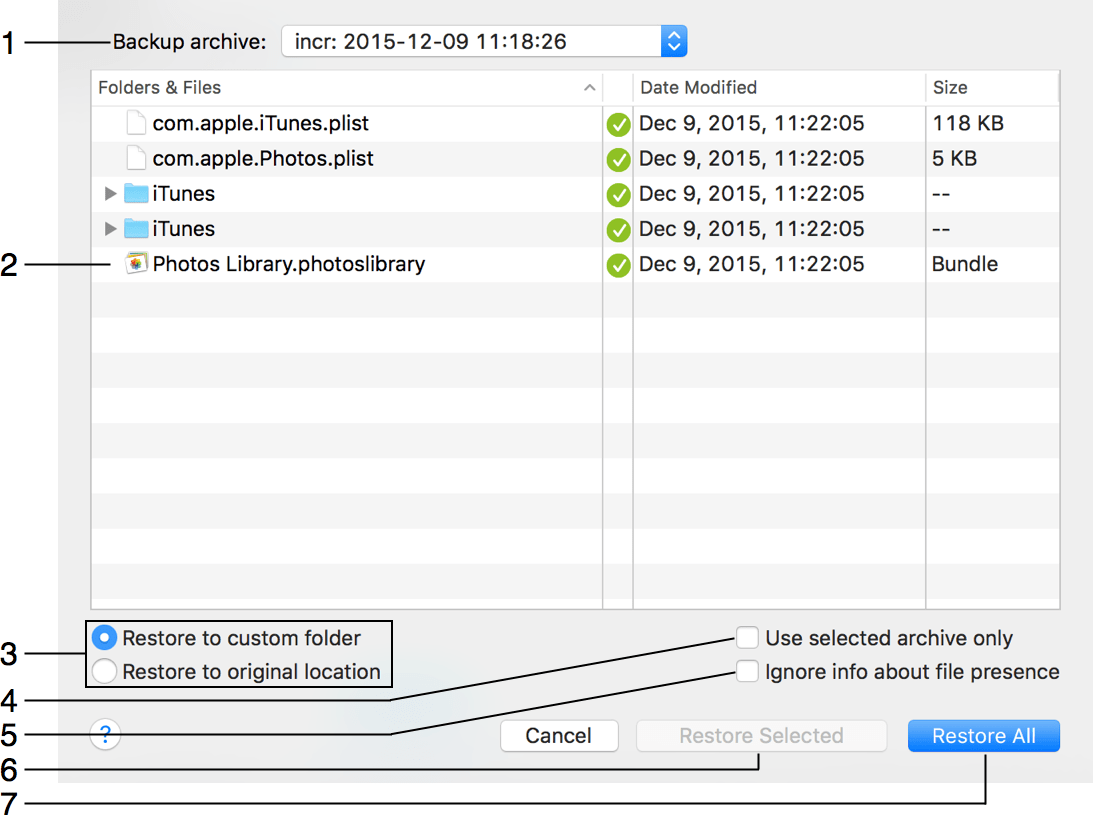
1 – The list of already created backups for the current project. You can choose one of them to restore the included files. A tick mark near the file name (archived backups only) indicates that a file is present in the selected backup.
2 – The list of files and folders in the current backup project. You can select one or several files to restore only them.
3 – Select where to restore files. If Restore to custom folder is selected, the program will ask you to choose a folder.
4 – Select Use selected archive only to restore files only from an archive selected in the drop-down menu at the top. This option is available only for incremental backups. It can speed up the restoration process because the program wouldn't have to process all incremental archives created before the selected one. Before using this option, make sure that a tick mark is present next to a file you want to restore. If there is no tick mark, choose another archive where the file is ticked, or restore with this option deactivated. This option is available only for archived backups.
5 – Select Ignore info about file presence to try to restore files from a backup selected in the drop-down menu even if they are marked as absent. This option is effective with backup projects created in older versions of Get Backup. This option is available only for archived backups.
6 – The Restore Selected button restores only files selected in the list.
7 – The Restore All button restores all files.