Creating Archived Backups
To open the Properties dialog, click the gear icon below the project list or choose Process > Properties/Schedule… menu item.
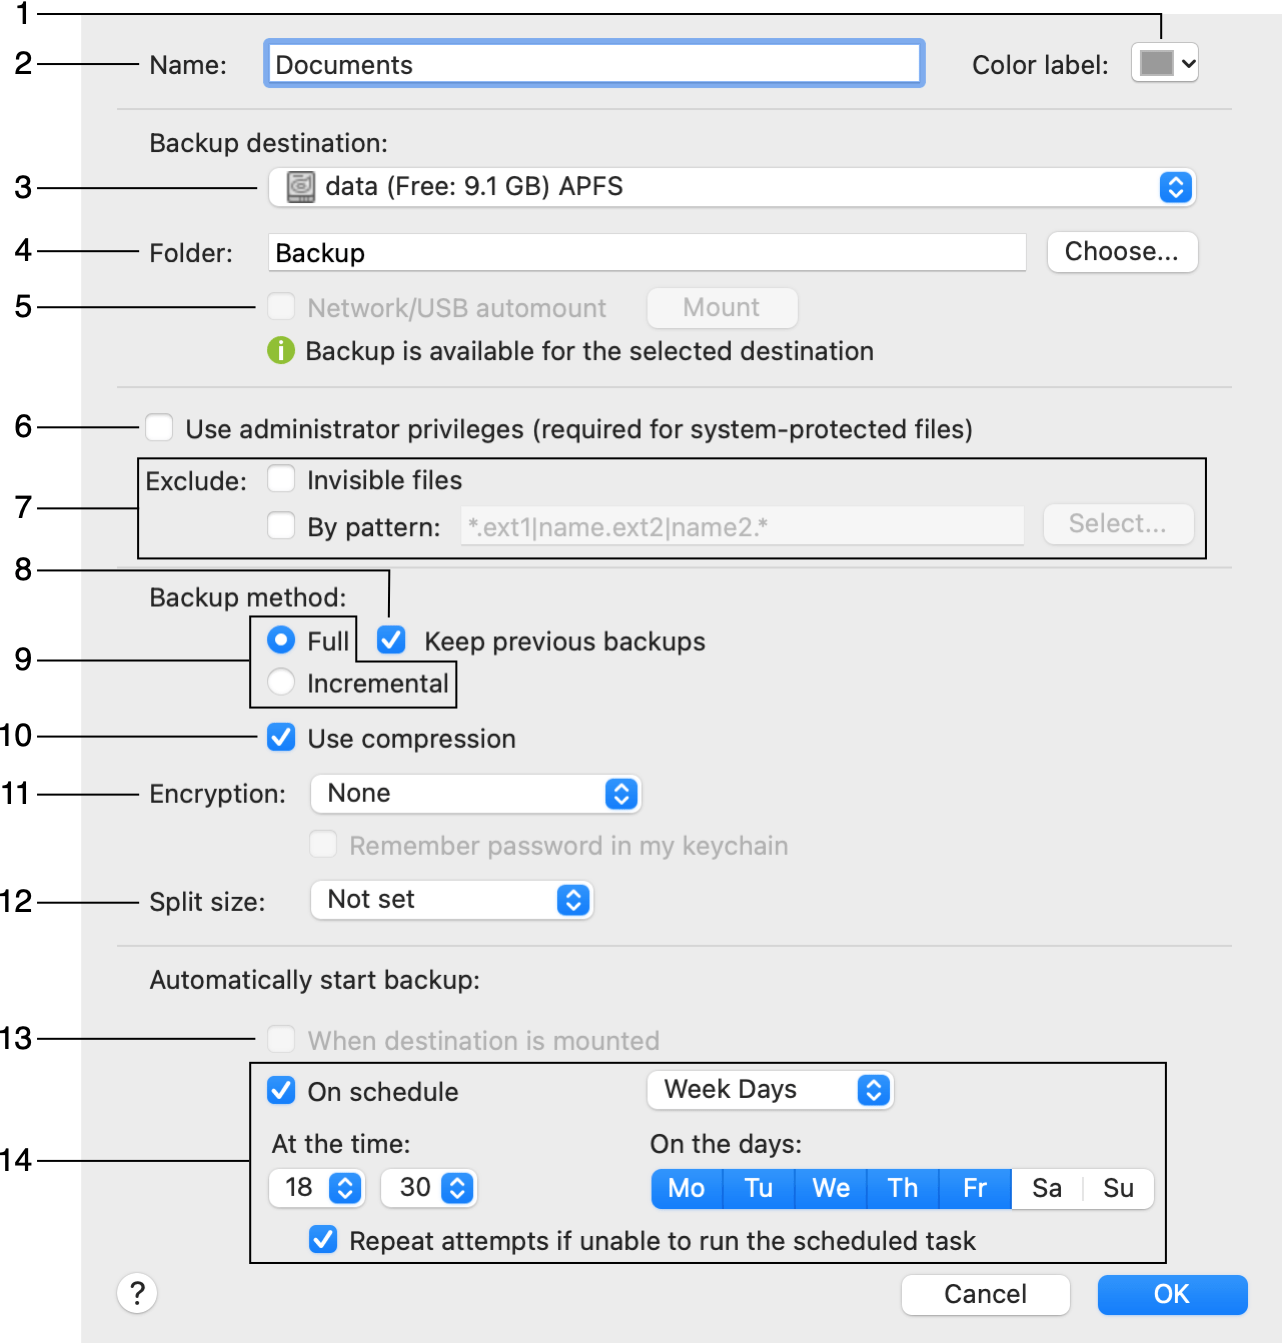
1 - The color of the tag in the project list. This can help you highlight projects by importance, frequency of creation or by other principle.
2 - The project name. It is displayed in the main window. Note that projects with identical names are not allowed.
3 - The backup destination drive. Here you can choose a volume, removable drive, network drive or CD/DVD/Blu-ray drive available on your computer.
4 - Select a folder on the destination drive.
5 - The Network/USB automount check box allows the program to mount the selected disk automatically before writing files to it. The Mount button lets you mount the selected disk manually. These two controls are available if you select a network or external drive as the destination.
6 - Run the program with administrator privileges. To activate this option, you will have to input the administrator's password.
7 - The Exclude section allows you to create a set of rules for automatic exclusion of files from the archive. By selecting the By pattern check box, you can create your own rule. This is described in the Exclude Files by the Pattern section.
8 - An option to keep only the most recent version of the backup or all of them. When the check box is activated, running the backup project will add new versions of the backup to the destination folder taking more and more disk space. In this case, you can delete old backups manually. This feature is available only with the Full backup type.
9 - The type of the backup project. See Backup Archive Types for more detail.
10 - An option to create compressed archives. With compression, archives usually take less disk space.
11 - The archive encryption method. If encryption is activated, you will have to input a password when you backup your files, and when you restore them. You can choose to remember the password in the Keychain.
12 - The Split size control allows you to split the archive into pieces (volumes) so that the size of any individual volume does not exceed the stated size. This is useful when you write backups on CD/DVD discs.
13 - Activate the automatic backup creation when the source and destination volumes are mounted.
14 - Activate the automatic backup creation by schedule.
A folder added to your project may contain some files which you don't want to back up. The Exclude tool can help you automatically exclude such files.
You can choose a predefined file type or create your own pattern. To do this, activate the By pattern option and select a file you want to exclude. For example, if you select a report.txt file and choose the "the same extension" option, all .txt files will be excluded.
A pattern can contain a file name or extension, or both. Several patterns can be combined to create a complex rule.
To add a pattern:
You can create a pattern manually by typing it into the edit box. You should follow these rules: