Working with Layers
The list of layers is located in the Content panel. It allows you to access layers disregarding their visibility on the canvas. Also you can change the order of layers, and control some of their properties. The other properties such as the Opacity or Blend Mode can be found in the Inspector.
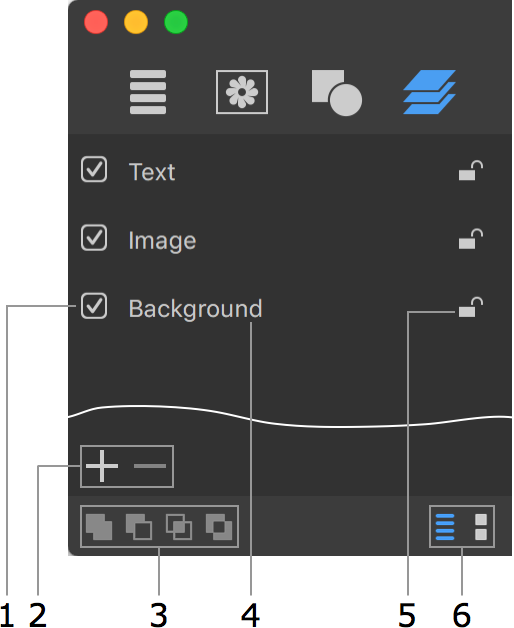
1 – Display or hide the layer content.
2 – Add or remove layers.
3 – Boolean operations: Union, Subtract, Intersect and Join. For details, see Merging Layers.
4 – The layer name.
5 – Lock or unlock a layer. Locking layers prevents them from movement and modification.
6 – Display the layer names or thumbnails.
You can adjust the parameters of several layers simultaneously. To do this, select these layers making sure that they are of the same type (either 2D or 3D). Then apply the desired effect and set up its parameters. To select several layers, click on their names holding down the Cmd or Shift key.
To change the layer name, double-click on it in the list.
The order of layer names in the list reflects the layer stacking order in the design. The layer located at the top of the list is atop the others on the canvas. The layer at the bottom of the list is behind all of the other layers.
To change the stacking order, drag a layer to a new position in the list.
Click the "plus" button to add a new layer.
To create a copy of a selected layer, choose Edit > Duplicate command from the main menu.
Click the "minus" button to remove the selected layer.