Cloning Disks
For all tasks described here, use the Disk Utility application located in the Applications/Utilities folder.
Select your disk (not a volume) in Disk Utility. The partition map scheme is indicated in the table.

If the sidebar displays only volumes, select the View > Show all Devices in the main menu.
In Disk Utility, select a volume. Its format will be indicated right below the volume name in the upper section of the main window.
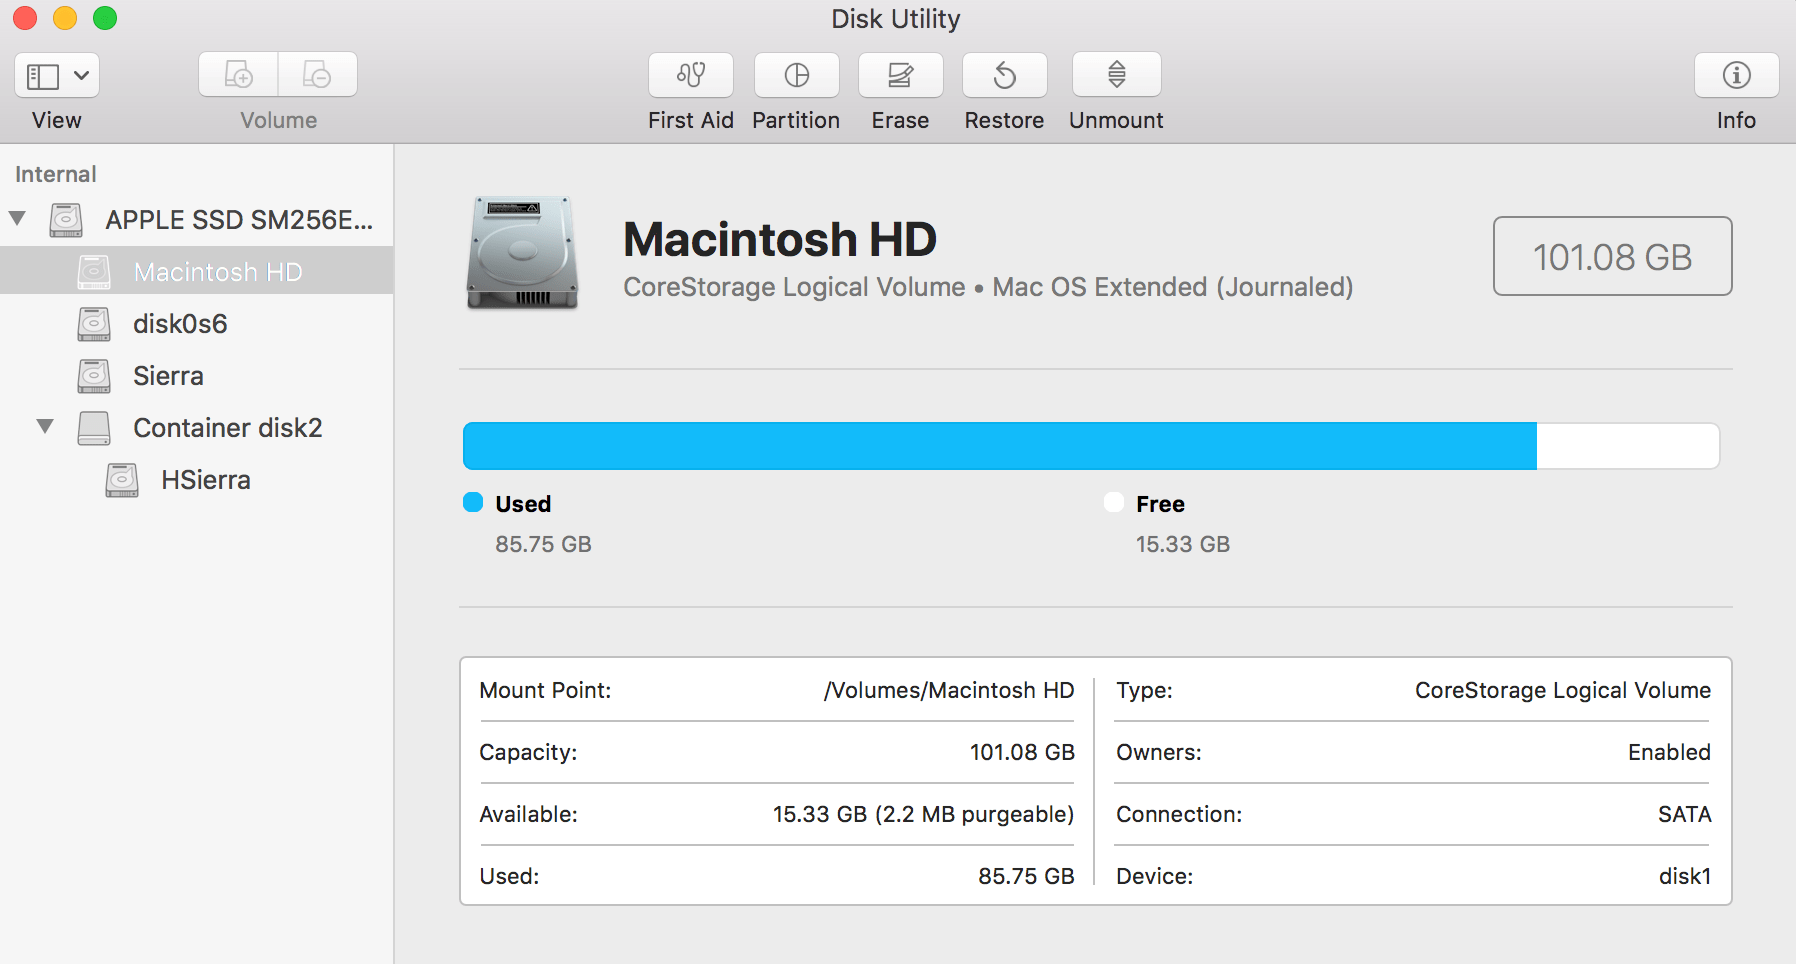
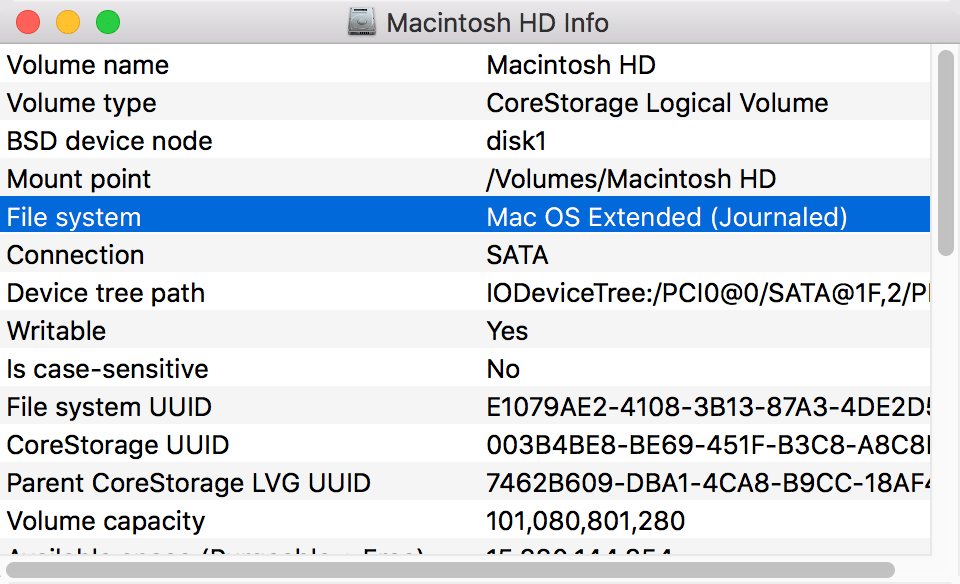
Also, you can click the Info button in the toolbar to get more details.
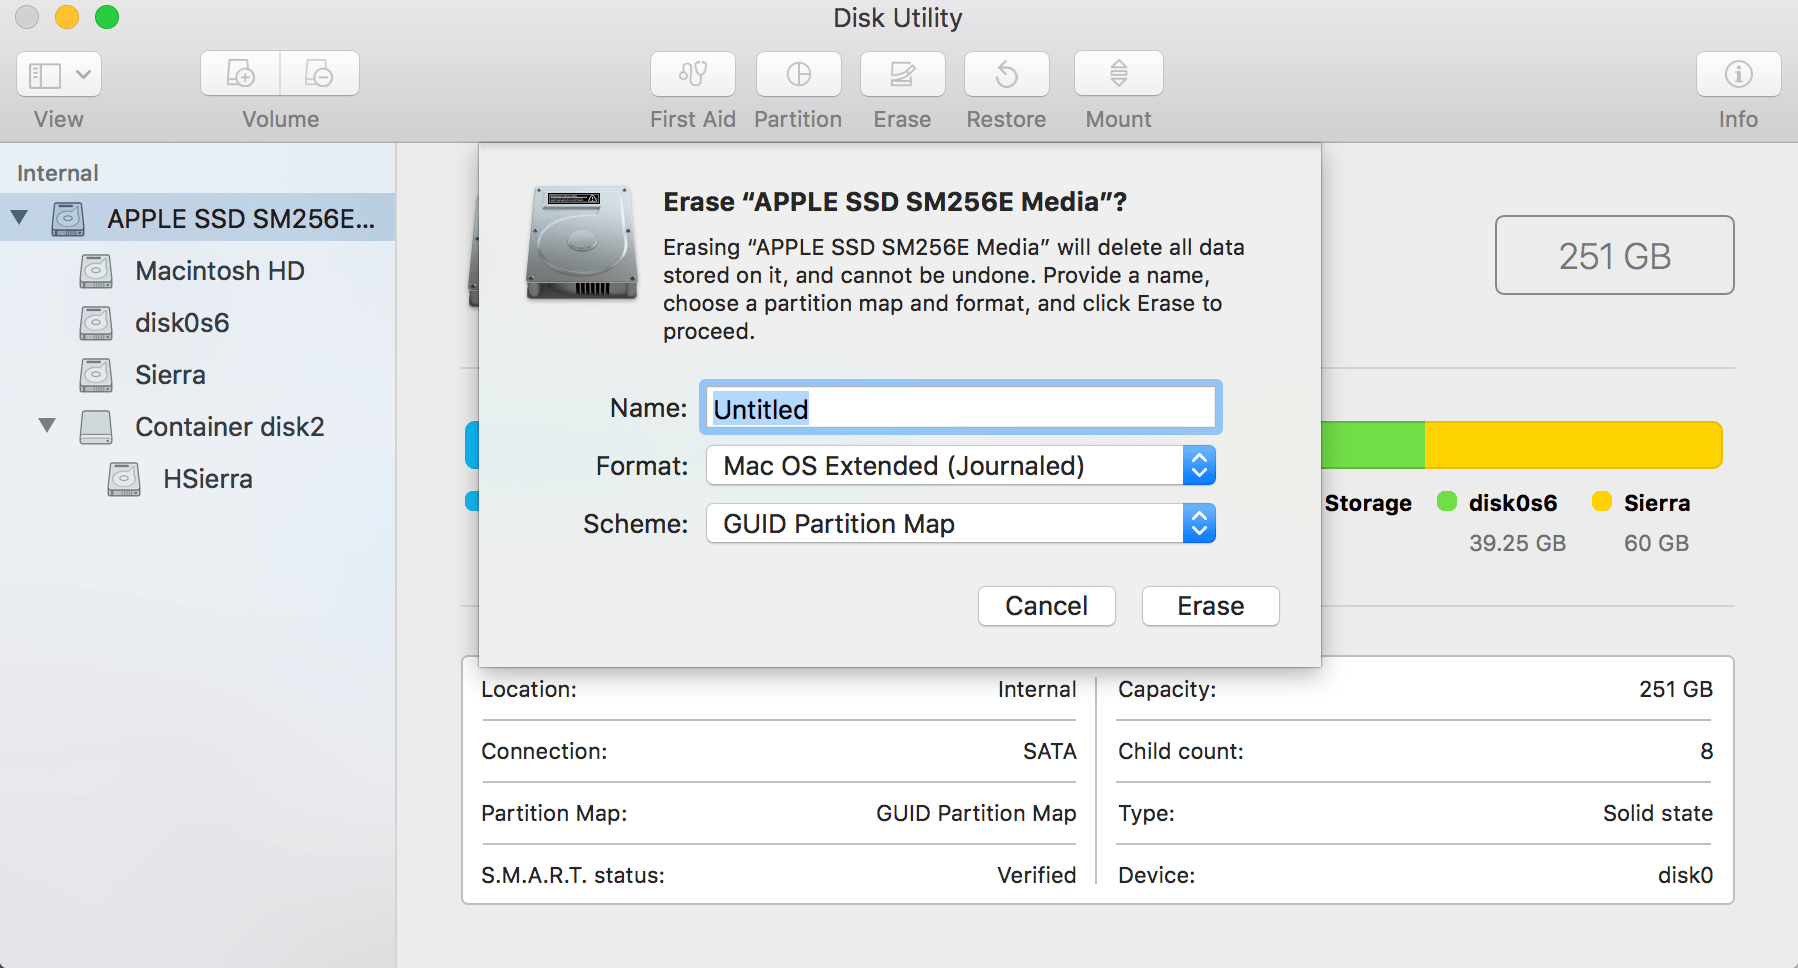
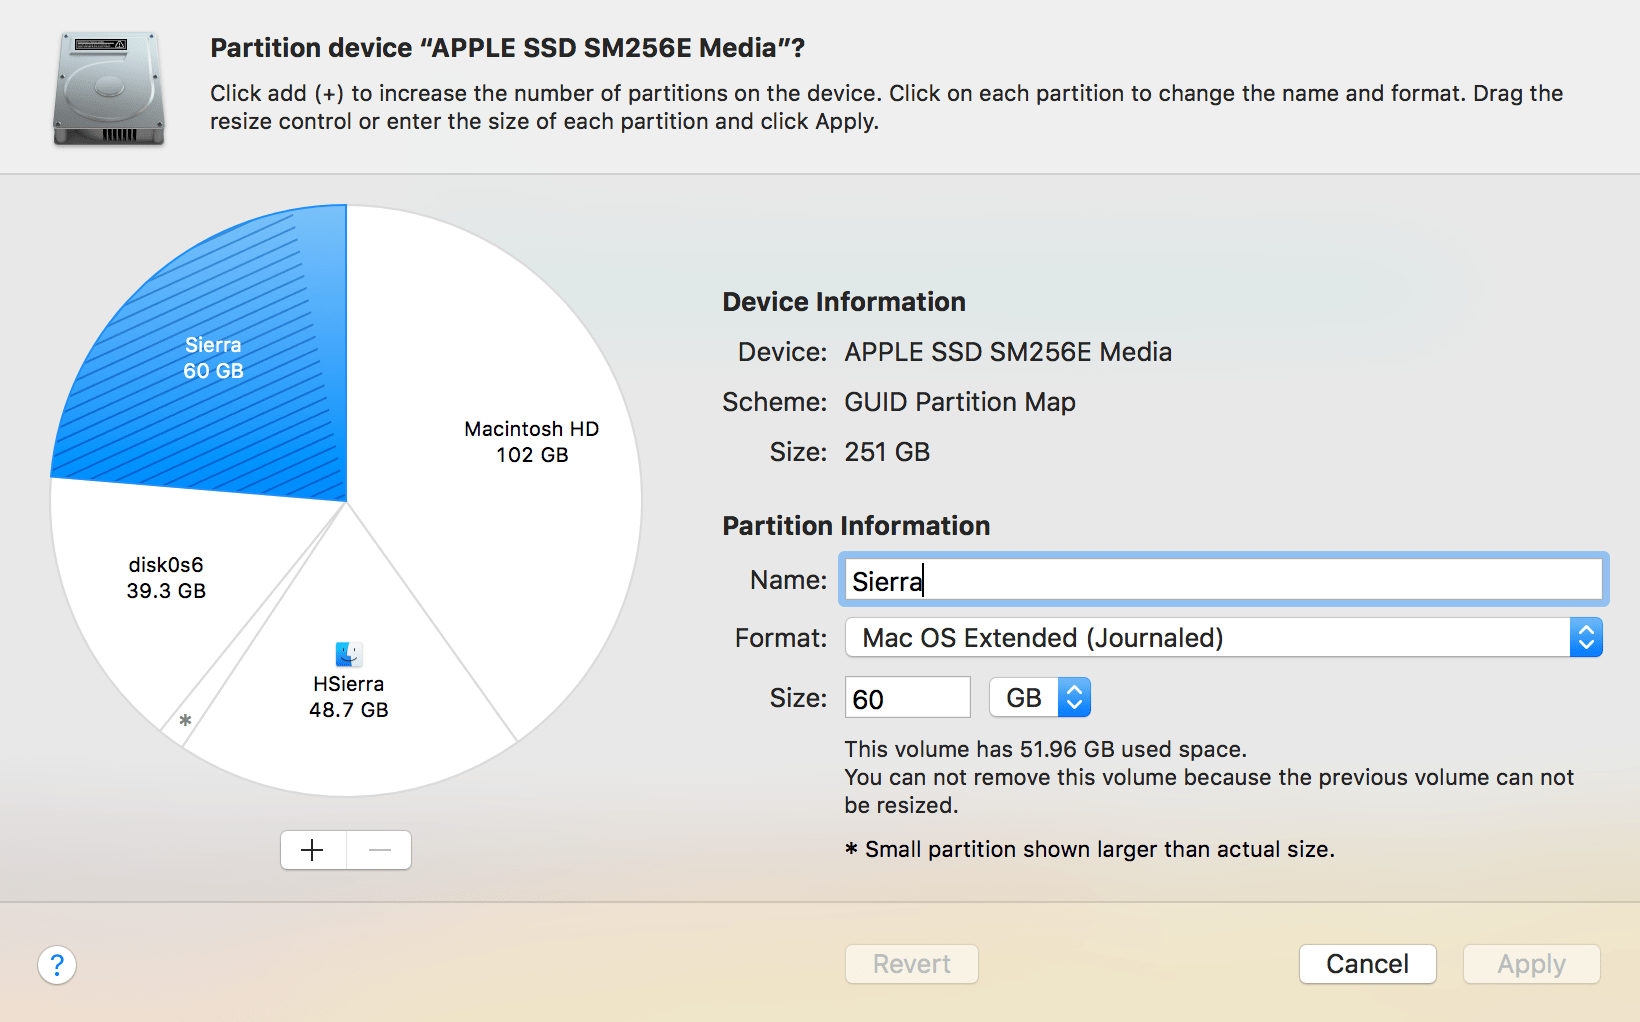
Partitioning can erase all data on your disk. It is recommended that you backup your data before making any changes.
To choose the partition map scheme, select the disk (not a volume) and click the Erase button. Choose GUID Partition Map to make the disk bootable.
To partition your disk, select it and click the Partition button. Then select how many partitions you need, and specify the name, formatting and size for each of them.
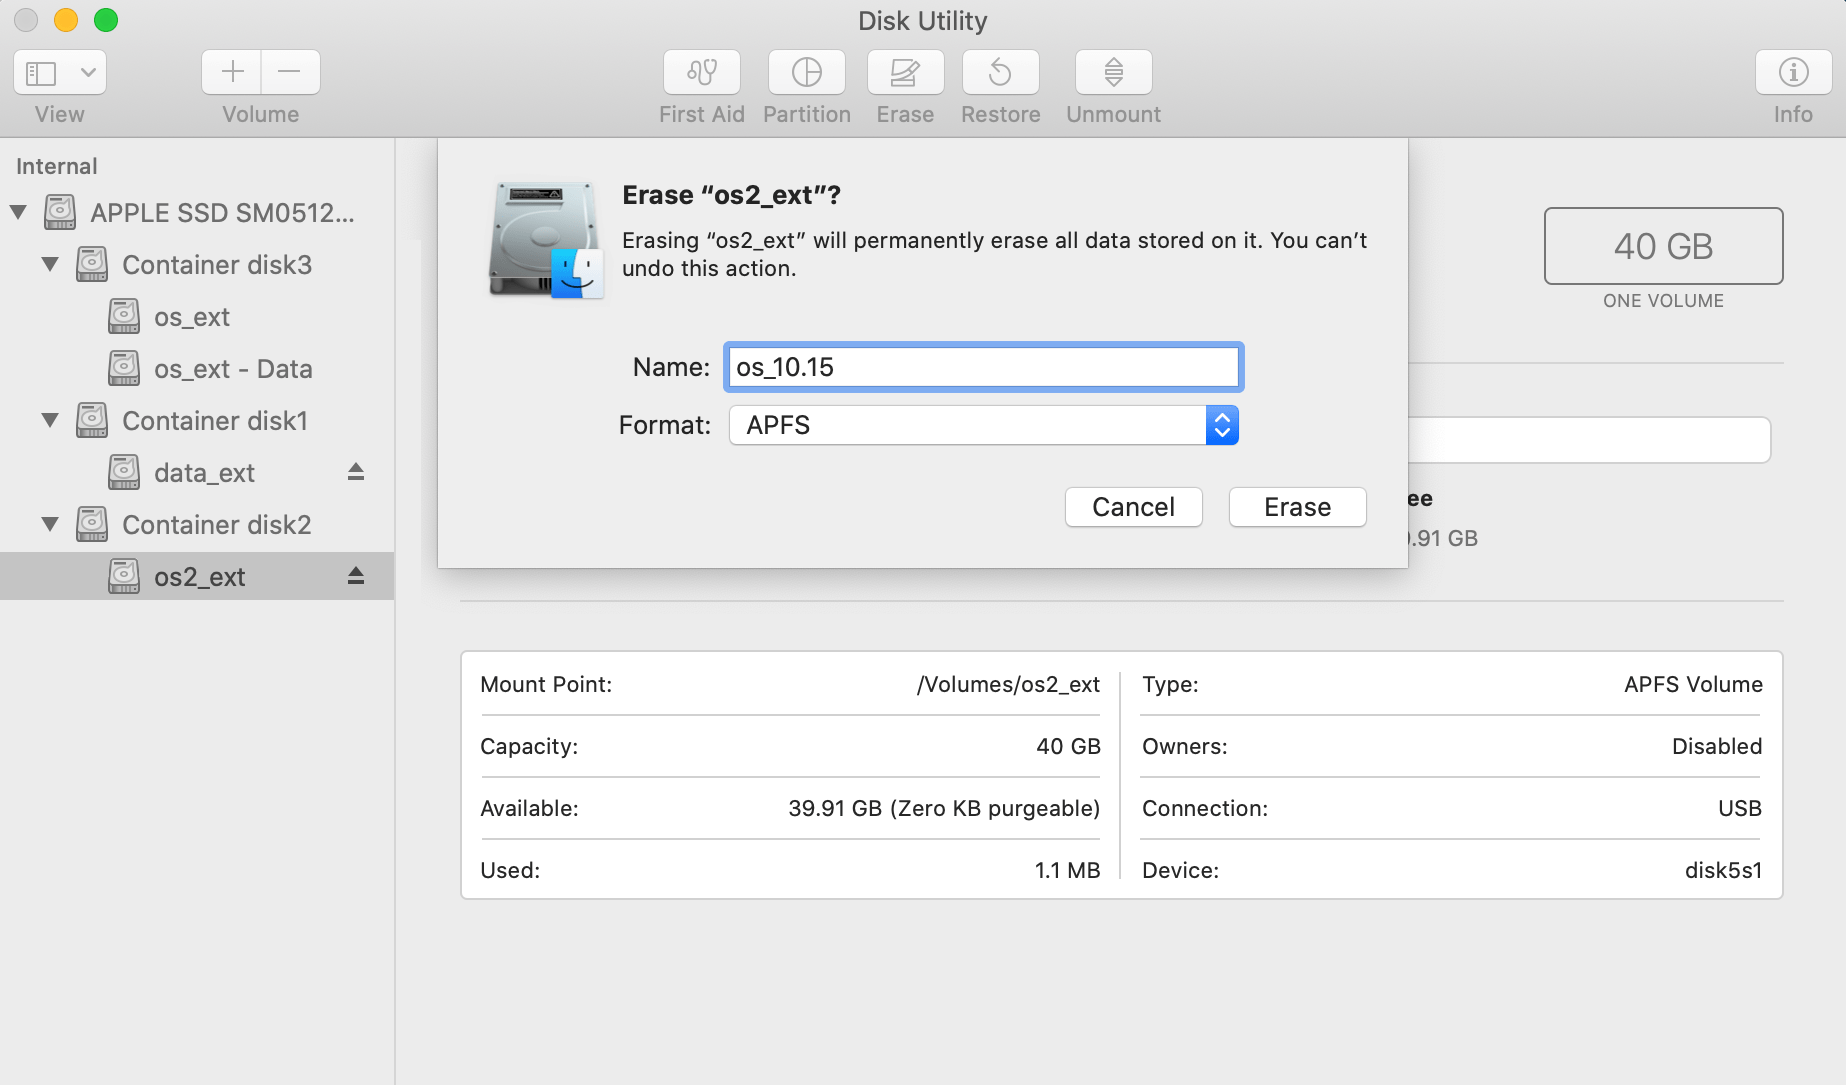
Formatting erases all data on your disk or a volume (depending on what is selected).
You can erase and format the whole disk. If there are several volumes, you can format them separately.
To format a volume, select it. Click the Erase button in the toolbar and specify the volume name and formatting. It is recommended that you choose the APFS disk format.