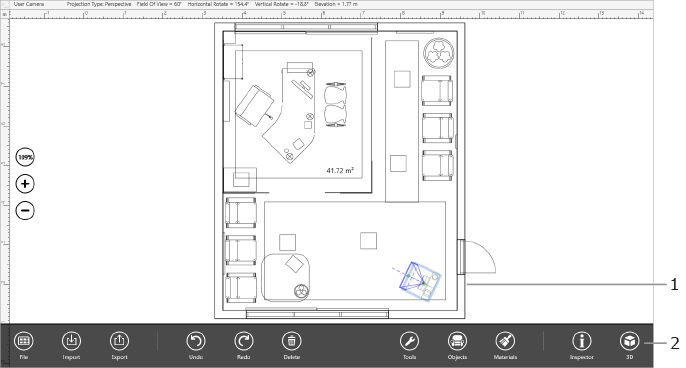
Live Interior 3D Interface
1 – The working area. Here you can preview and modify your project in the 2D or 3D mode.
2 – The app bar. Buttons on this bar let you access different sets of tools.
The main window can display either the 2D or 3D view.
To interact with Live Interior, you can use your mouse and keyboard as well as the touch screen (depending on the configuration of your device or computer). The program supports standard Windows gestures and allows you to do everything using your touch screen only. Most of operations described in this document are described for touch screen users.
To select an object, tap or click on it.
To move an object, drag it with your finger or cursor.
To open a contextual menu with commands applicable to a specific object, touch this object and hold for about a second, then take your finger away. If you are using a mouse, right-click on an object.
To zoom in or out, pinch or stretch with two fingers. The plus and minus buttons on the left side of the canvas change zoom in and out on the floor plan too. The third button has two functions. The first tap zooms the floor plan to 100%. The second tap fits the floor plan to the screen.
The 2D View can display rulers. To turn them on or off, use the 2D View section of program settings. The top left corner indicates the current measurement unit. Tap on it when you need to choose a different one from a popup menu. This menu also gives you a quick access to the project scale settings.
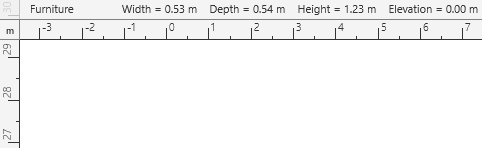
The Information bar above the horizontal ruler shows detailed information about the selected object, such as its dimensions, elevation and orientation. You can show or hide the bar by showing or hiding the rulers.