
Live Interior 3D Interface
The app bar is located at the bottom of the screen. The buttons on it give you access to the most often used commands. To hide or show the app bar, swipe from the bottom edge of the screen.
1 – The File button opens a submenu with commands described below.
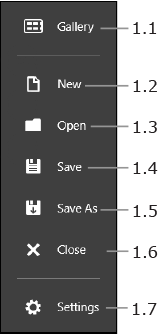
1.1 – Open the Project Gallery. It gives you the access to your own and sample projects. In the Project Gallery, you can also find links to online resources related to the program.
1.2 – Create a new project.
1.3 – Open a project.
1.4 – Save the current project.
1.5 – Save the current project with a new name.
1.6 – Close the current project.
1.7 – Open the Settings panel.
2 – The Import button lets you import 3D objects from the Trimble 3D Warehouse™ online gallery and from files (Pro version only). Additionally, you can import regular 2D images and display them in the 2D or 3D view.
3 – The Export button lets you export the whole project or a model within the project in a 3D format, save a screenshot of the 3D scene, or send the current view to other software to share it with other people. In the Free version, only sharing is available.
4 – Undo the last change.
5 – Redo the last change.
6 – Delete the selected object.
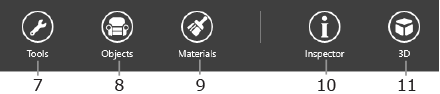
7 – This button opens a set of tools for editing your floor plan. See the 2D Tools section.
8 – Open or close the Palette with objects.
Related topic: The Palette
9 – Open or close the Palette with materials.
Related topic: The Palette
10 – Open or close the Inspector.
Related topic: The Inspector
11 – Toggle 2D and 3D views.
To show or hide these tools, tap the Tools button when the 2D view is activated.
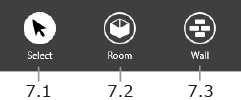
7.1 – The Select tool lets you select and move objects.
7.2 – The Room tool lets you create a room by drawing a rectangle on the floor plan.
7.3 – The Wall tool is used to draw, single straight walls.
Related topic: Walls
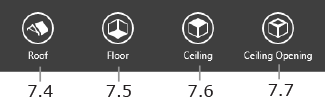
7.4 – The Roof tool. It creates custom roofs.
Related topic: Adding a Custom Roof
7.5 – The Floor tool. You can add a custom floor in place of the one added by the program automatically.
Related topic: Ceilings and Floors
7.6 – The Ceiling tool. You can add a custom ceiling in place of the one added by the program automatically.
Related topic: Ceilings and Floors
7.7 – The Ceiling Opening tool. Creates an opening in a slab on the current story. You can use it to create a mezzanine.
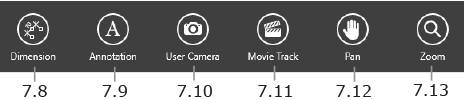
7.8 – The Dimension tool lets you measure and show the distance between any two points on your floor plan.
7.9 – The Text Annotation tool adds text boxes for typing or pasting text.
Related topic: Text Annotation
7.10 – The User Camera tool. It adds individual cameras.
Related topic: Using Cameras
7.11 – The Movie Track tool. It adds movie tracks to record videos.
Related topic: Creating Movies
7.12 – The Pan tool. It lets you scroll your floor plan.
7.13 – The Zoom In tool.

Buttons 12-17 in the 3D view have the same functions as 1-6 in the 2D view.

18 – This button renders the 3D scene with lights and shadows to create the best possible picture.
19 – This button is used to change the 3D rendering mode.
Buttons 20-23 in the 3D view have the same functions as 7-11 in the 2D view.
To show or hide these tools, tap on the Tools button.
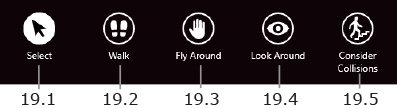
19.1 – The Selection tool.
19.2 – The Walk tool. To move in a certain direction, tap and hold your finger on the respective screen side. Here are some examples. To move forward, touch the top. To rotate, touch the middle of the left or right sides. To move in a circle, touch the upper left or right corner. To decrease the speed, place your finger closer to the center of the screen.
19.3 – The Fly Around tool, lets you view a point in the 3D view from all sides. To fly around an object, show it approximately in the middle of the screen. Then swipe over it.
19.4 – The Look Around tool lets you rotate in place. To do this, swipe towards the desired direction.
19.5 – The Consider Collisions option lets you control whether or not you can walk through walls and other objects. When it is activated, you cannot walk thorough objects.