Lighting
Live Interior 3D lets you create and edit light sources. This feature is available only in the Pro version.
To bring up the light source editor, open the contextual menu of an object and choose Edit Light Sources… Another way to open the editor is to tap on the Edit Light Sources… button in the Object Properties tab of the Inspector.
The word “lamp” will be used in this section for any object, that emits light (lamp, candle, fireplace, etc.). The word “light source” will be used for a part of a 3D model that simulates a single light source and is actually the source of light in the 3D scene. One lamp may have one or more light sources.
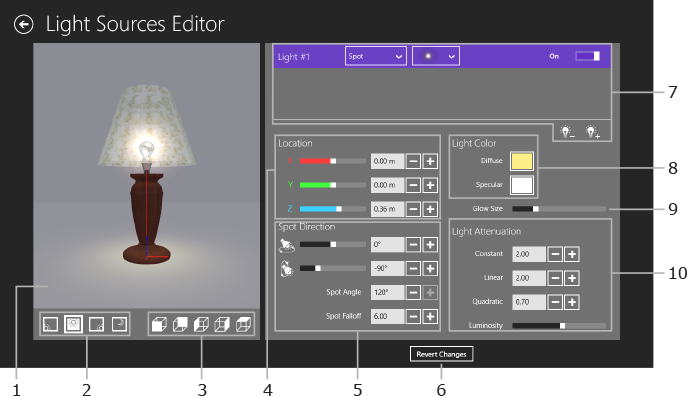
1 – Preview area. Double-tap on the preview to restore the default point of view. To zoom in or out, pinch or stretch with two fingers.
2 – Day time selector. Allows you to preview the light source at a different time of day.
3 – Viewpoint selector. Choose one of six predefined points of view (from front, from back, etc.).
4 – Location. These controls change the position of the current light source in relation to the lamp.
5 – Spotlight controls. They are activated when the current light source is of a spotlight type.
6 – Undo all changes made since opening the light source editor.
7 – List of light sources.
8 – Color controls.
9 – Glow Size control.
10 – Luminosity and Light Attenuation controls. They define how quickly the light fades out depending on the distance from the light source.
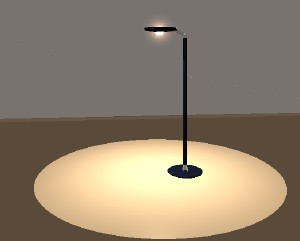
The preview shows the lamp in a small empty room. You can see how the light drops on walls, floor and ceiling.
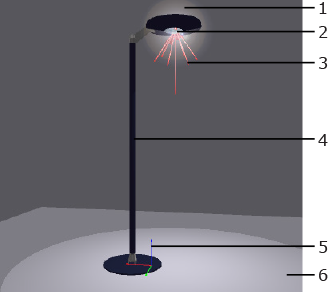
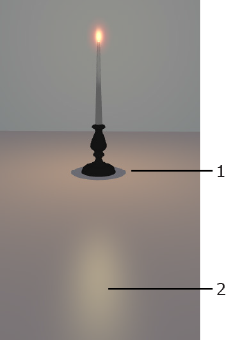
1 – Glow.
2 – Location of the light source.
3 – Cone that displays the cone of rays and the location of the light source.
4 – A lamp object.
5 – Origin point and coordinate axes of the lamp. The colors of axes correspond to the colors of X, Y and Z coordinates in the Location section.
6 – Reflection of the light on the floor.
To change the point of view, place the cursor over the preview box. Press the mouse button (left one for 2-button mice) and move the mouse around. To choose a predefined view, use the view point selector. To restore the default view, double-click on the preview.
To preview the lamp in different day or night light conditions, use the daytime selector.
The preview zoom buttons are located above the preview to the right.

A lamp may have several light sources. To select and modify one, click on it in the list.
To add a light source, click the plus button below the list. To remove the selected light source, use the minus button.
A light source has the following parameters next to its name:
To move a light source to another location, use the Location controls.
The location is calculated according to the coordinate system of the lamp. The zero point is shown in the preview.
The Light Attenuation parameters (Constant, Linear and Quadratic) control how quickly the light fades out depending on the distance from a point in the 3D space to the light source.
The parameters are used by the rendering engine for calculating the attenuation factor:
Af = 1 / (Kc + Kl*D + Kq*D²)
Af – Attenuation factor; Kc – Constant; Kl – Linear; Kq – Quadratic. D – distance from the light source to a point in the 3D space (when the program is calculating light for this point).
The Luminosity parameter changes the common luminosity of a light source. It does the same as the Luminosity control in the Light Properties tab of the Inspector window.
Tip:
Adjust the Light Attenuation parameters when the Luminosity slider is in the middle.
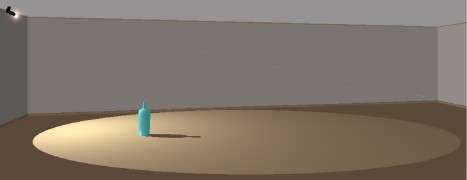
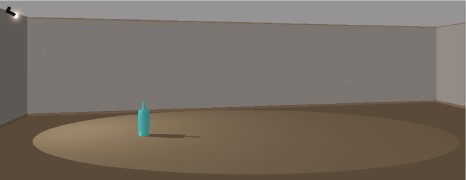
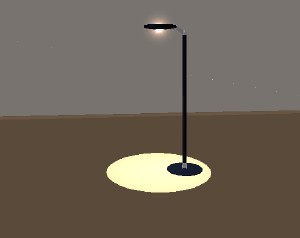
The images below demonstrate how parameters affect the light spot.
Default parameters:
Constant = 0.50
Linear = 0.30
Quadratic = 0.00
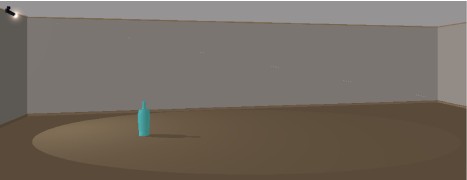
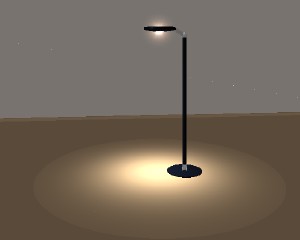
Constant increased:
Constant = 3.00
Linear = 0.30
Quadratic = 0.00
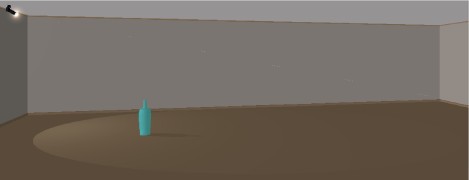
Linear increased:
Constant = 0.50
Linear = 2.00
Quadratic = 0.00
Quadratic increased (light fades quicker than above):
Constant = 0.50
Linear = 0.30
Quadratic = 0.80
To set up a beam of light, there are additional parameters. They are available when the type of a light source is Spot.
Spot Direction angles are measured in degrees. When you adjust one of angles, the others may change automatically.
 |
Spot Angle = 80° Spot Falloff = 1 |
 |
Spot Angle = 40° Spot Falloff = 1 |
 |
Spot Angle = 80° Spot Falloff = 12 |
You can adjust Diffuse Color (1) that defines diffuse spot color, and Specular Color (2) – the reflection of a light source on glossy surfaces. The Diffuse Color can be also adjusted in the Light Properties tab of the Inspector.