| www.belightsoft.com/liveinterior | Start of Help | Index > Working with Materials |
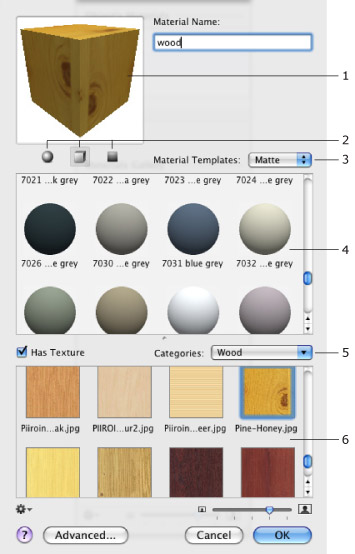
The dialog shown in the picture is used to create new materials. To open it, click the gear button at the bottom of the Materials tab in the Inspector. Choose New Material… in the pop-up menu.
1 – Preview box.
2 – Preview mode switch: sphere, cube and flat surface samples.
3 – Choose either matte or glossy material type.
4 – Library of templates.
5 – Texture category selector.
6 – Library of textures.
To create a new material:
To add a custom texture, right-click on the texture library and choose Import Custom Texture....
To remove a custom texture, right-click on it and choose Delete Current Texture....
If you want to adjust all the parameters by yourself instead of using material templates, click the Advanced button to open the material editor.