| www.belightsoft.com/liveinterior | Start of Help | Index > Live Interior 3D Workspace |
Before starting your work on the first project, set up the program. The program settings are stored in the program preferences file and apply to all projects. The program settings are used as default settings for new projects.
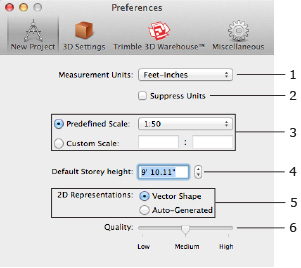
These settings are used as defaults for Project Setup when you create a new project. To change the current project only, use File > Project Setup.
1 – Measurement units.
2 – The Suppress Units check box lets you hide measurement units in the 2D layout (you will see 40' 00.0" instead of 40' 00.0" ft, or 2.6 instead of 2.6 m).
3 – Scale of the floor plan in the 2D view. "1:100" means that one meter will be equal to one centimeter on the screen.
4 – The default story height for new projects.
5 – Type of 2D representation. Here you can choose either the line drawing type, or automatically created object's top view.
6 – The quality of auto-generated 2D representations.
3D settings affect the quality and speed of rendering a picture in the 3D view.
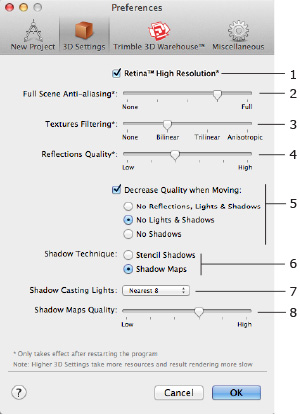
1 – Retina™ High Resolution
2 – Full Scene Anti-Aliasing
3 – Textures Filtering
4 – Reflections Quality
5 – Decrease Quality when Moving
6 – Shadow rendering technique
7 – Shadow Casting Lights
8 – Shadow Maps Quality
1 – The Retina™ High Resolution check box enables native high resolution for all the 3D renderings and auto-generated 2D representations (when activated) on all Macintosh computers with Retina™ display. If you face the performance decrease, deselect this check box.
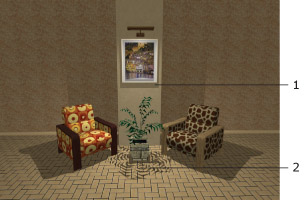
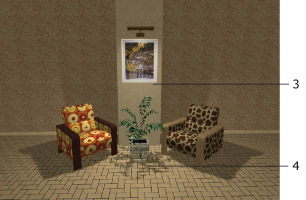
2 – Full Scene Anti-Aliasing makes the picture look softer by smoothing edges of objects.
To apply the parameter change, restart the program.
Anti-aliasing: off
|
Anti-aliasing: on
|
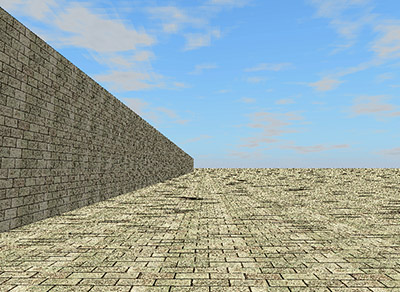
3 – Textures Filtering lets you choose a type of filter, or turn it off.
Texture filtration softens transition from texture tiles near the view point to texture tiles far away.
To apply this parameter, restart the program.
Filter: None
|
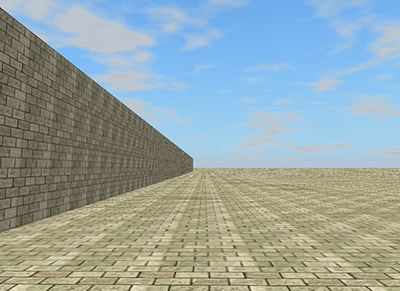
Filter: Trilinear
|
Note that in some cases choosing different filter types produces similar pictures. If only plain color materials were used in the scene, you may not notice any difference when the texture filtration is on and off. It is not recommended that you set this parameter to None because textures are used in most 3D models.
4 – Reflections quality. This parameter affects how detailed the reflected picture is. At lower quality, the picture may look more pixelated, but rendering is faster.
5 – The Decrease Quality when Moving option can change the rendering mode automatically. When this option is activated, the program turns off reflections, shadows and lights while you are walking around in 3D. When you stay still, lights, reflections and shadows restore. Note that if lights and shadows are already turned off in View > 3D View > Rendering Quality (or in the toolbar) then nothing will change when you start walking in 3D.
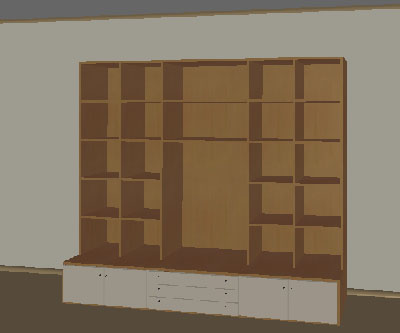
6 – Shadow rendering technique. The program lets you choose the Stencil Shadows or Shadow Maps mode. The Stencil Shadows mode is the default mode.
The 3D pictures rendered by these modes are different.
Stencil Shadows
|
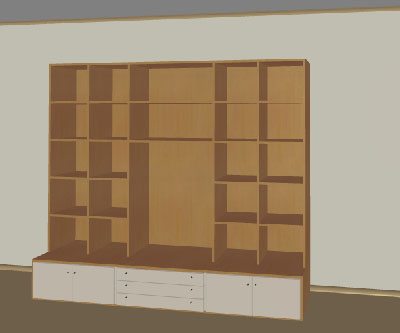
Shadow Maps
|
The difference:
7 – Shadow Casting Lights defines how many light sources (including the sun and the moon) are taken into account when the program is rendering shadows. At smaller numbers, rendering is faster.
Note that if the quantity of considered light sources is too small, you can get an unrealistic picture because you cannot see shadows that normally exist.
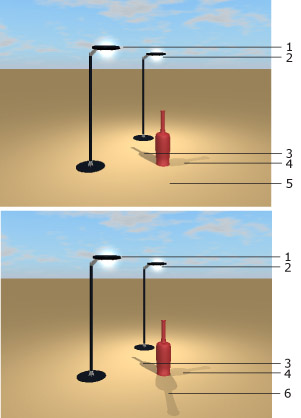 |
1 – Light source 1 |
By enabling this option, you can speed up walking around in complicated projects and on slow computers.
8 – The Shadow Maps Quality can be used to increase the rendering speed. To do this, set lower or intermediate values. At low quality, shadows look blurred.
These options control import of Trimble SketchUp™ objects.
Make all surfaces double-sided to avoid invisible surfaces changes the way of importing Trimble SketchUp™ objects. It is set by default.
Split object instances splits a compound object to make its parts separate objects in Live Interior 3D.
See details in the Import Options section.
Show Assistant on start-up opens the Assistant when you launch the program. This lets you choose and load a sample project.
Animate Library 3D Preview by default enables automatic rotation of the selected 3D object in the preview box. Deselect this option to increase computer performance.
The Save supplied content in projects option lets you control the project file size. Normally, the 3D models of all objects used in the project are saved along with the project file. When the option is selected, links to the library objects are saved instead of the actual objects. The option affects only the objects taken from the built-in library. Modified library objects and objects imported from the outside Live Interior 3D are always saved in the project.
The Autosave modified projects option allows the program to automatically save a copy of a project to the same folder. If the program quits unexpectedly, at the next start-up the program it will open the autosaved copy.
Snap Sensitivity on 2D Plan defines how close you need to bring one object to another before the objects snap together.
Automatically check for updates lets you specify how frequently the program checks for updates.