| www.belightsoft.com/liveinterior | Start of Help | Index > Auxiliary Objects |
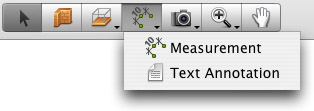
The Measurement tool lets you measure and show the distance between two points in your layout.
To add a dimension line:
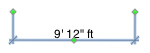
The dimension line object has three handles when selected. The middle handle lets you adjust the distance between the numeric value and the object you are measuring. The handles on the ends define the distance to be measured.
The measurement units will be the same as the ones used for the rulers. You can change them in the Project Setup dialog. To hide the measurement units, use the Suppress Units option.
The measurement tool can be snapped to object sides or to handles (of a wall, for instance). In this case it moves and changes its size together with the object. Placing handles of the measurement tool near these points will cause it to move separately from an object. Zoom in the 2D view and move the handles of the measurement tool around to be sure that they have snapped to the object.
To change the font, size or color of text, use the 2D Properties tab of the Inspector. The font size doesn't change when you choose another scale in the Project Setup dialog.
The Information bar displays the total length of all selected measurements.