File Synchronization
To open the synchronization tools, click the fourth button in the main window or press Cmd-4.
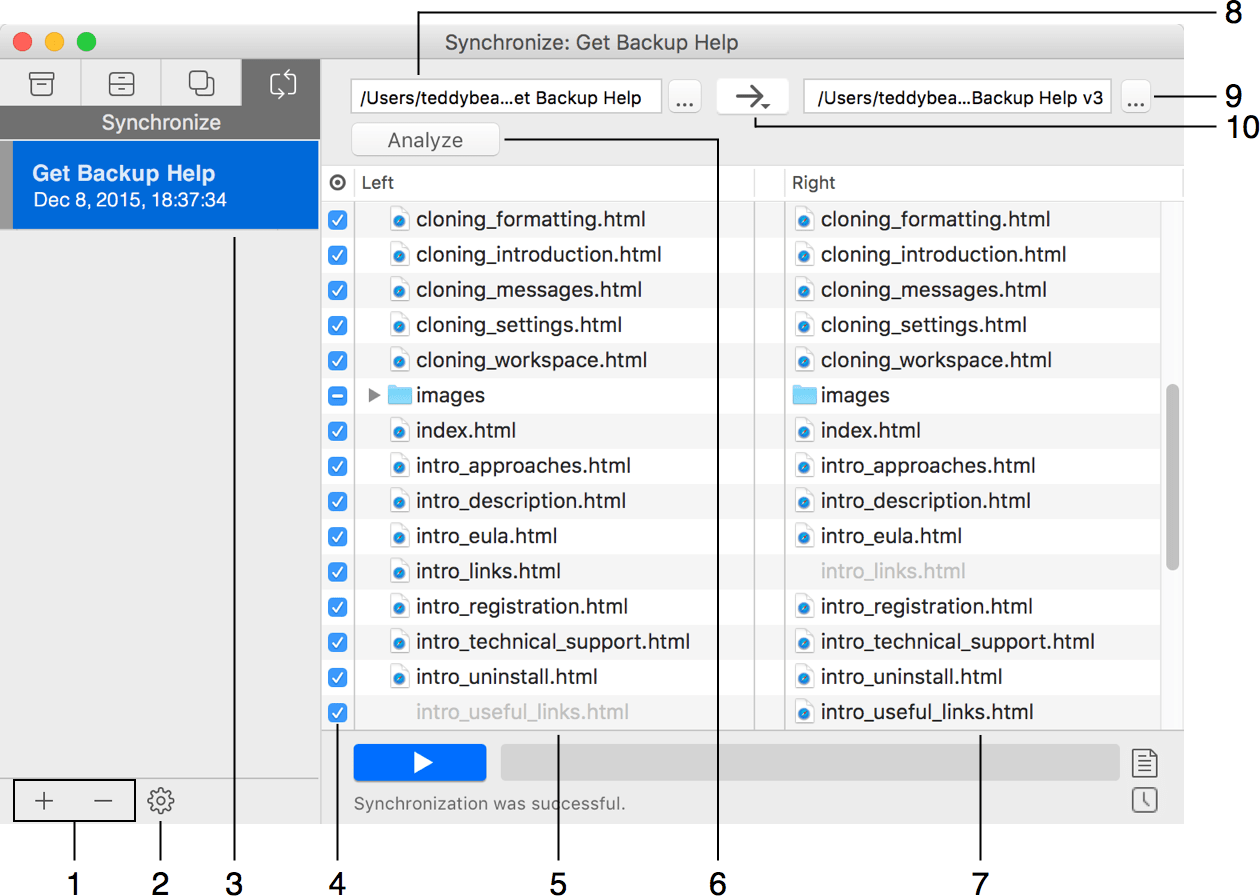
1 – Add or delete projects.
2 – Project properties.
3 – List of synchronization projects. Along with the project name, there is the date and time indicating when you synchronized data the last time.
4 – An option to exclude items from the synchronization process. If you exclude a folder, all its content will be excluded too. An excluded file or folder is treated as if it doesn't exist in the source.
5 and 7 – Lists of files and folders in the selected folders.
6 – The Analyze button compares the two selected folders. See The Meaning of Colored Signs and File Names.
8 and 9 – Choose the folders you wish to compare and synchronize.
10 – The direction of the synchronization.
Left to right updates only the content of the right column. The left column is the source.
Right to left updates only the content of the left column. The right column is the source.
Bidirectional updates the content of both columns.
The Analyze button compares the two selected folders and shows what the program will do if you run synchronization. Icons in the middle of the list will indicate what kind of action will be taken. If a file is not present in the source of destination, its name in the corresponding list is gray.
Gray circle means that no action will be taken.
![]()
Green arrow indicates that the respective file will be copied from the source to the destination.
![]()
Red cross indicates that the respective file will be removed from the destination because it is not present in the source. This is possible only if you deselect the Never delete anything check box in the project properties.
![]()
Red cross next to the excluded file indicates that the respective file will be removed from the destination because it was excluded. This is possible only if you deselect the Never delete anything check box in the project properties.
![]()
Contour blue arrow indicates that the destination folder's properties (such as modification date or colored label) will be updated. The content of the destination folder will remain unchanged.
![]()
Blue triangle indicates that the content or properties of the destination folder will be updated. Some files or folders of the destination can be updated or deleted.
![]()
Gray file name indicates that a file or folder is not present in one of the lists (source or destination) while it is present in another.
![]()