Cloning Disks
To open the disk cloning tools, click the third button in the main window or press Cmd-3.
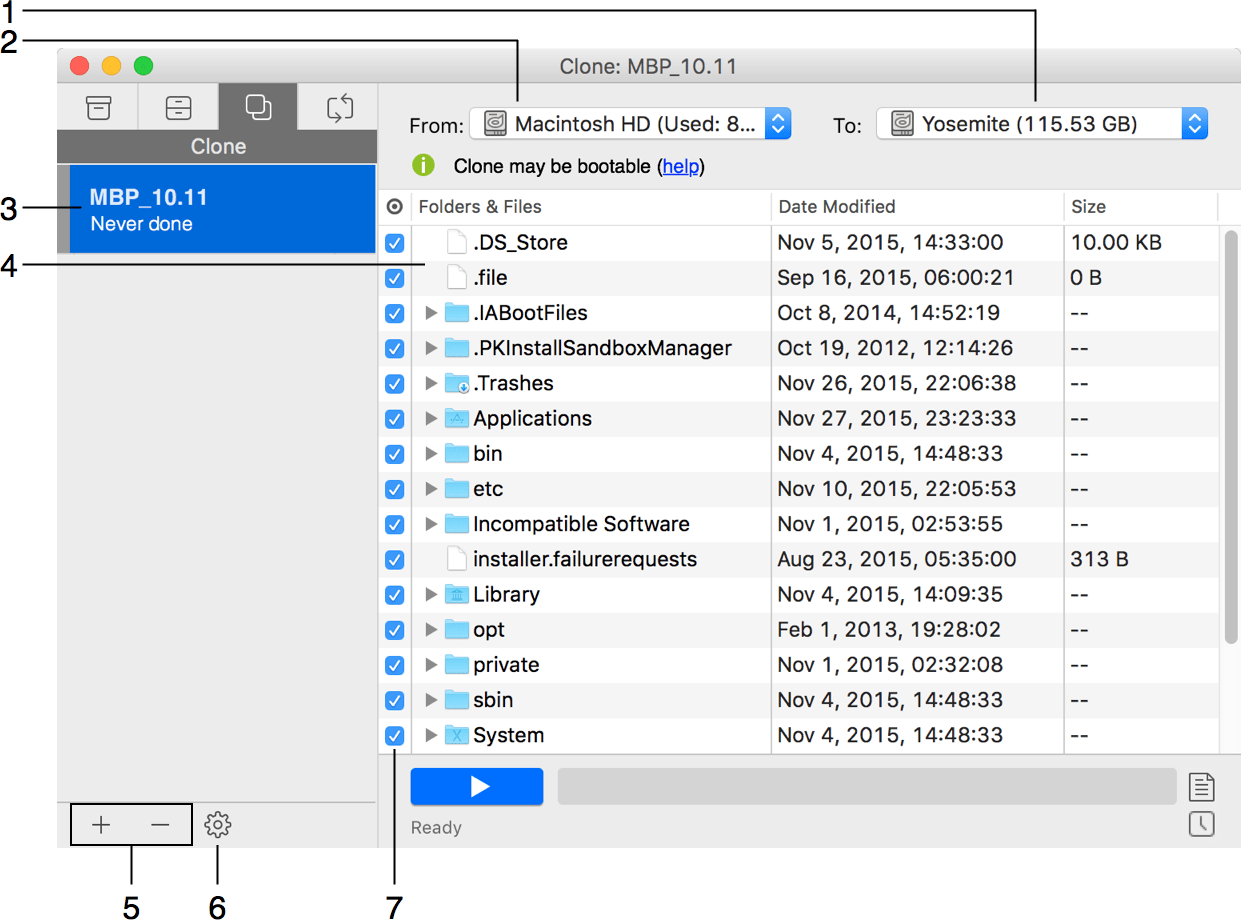
1 – Select the destination disk where a copy of the source disk will be saved.
2 – Select the source disk that will be duplicated.
3 – The list of projects.
4 – The content of the source disk. To preview the content of a folder, click on the triangle next to its name.
5 – Add or delete a project.
6 – The disk cloning project properties.
7 – An option to exclude items from the cloning process without deleting them from the backup project. If you exclude a folder, all its content will be excluded too.