Creating Backups
To open the backup tools, click the first button in the main window or press Cmd-1.
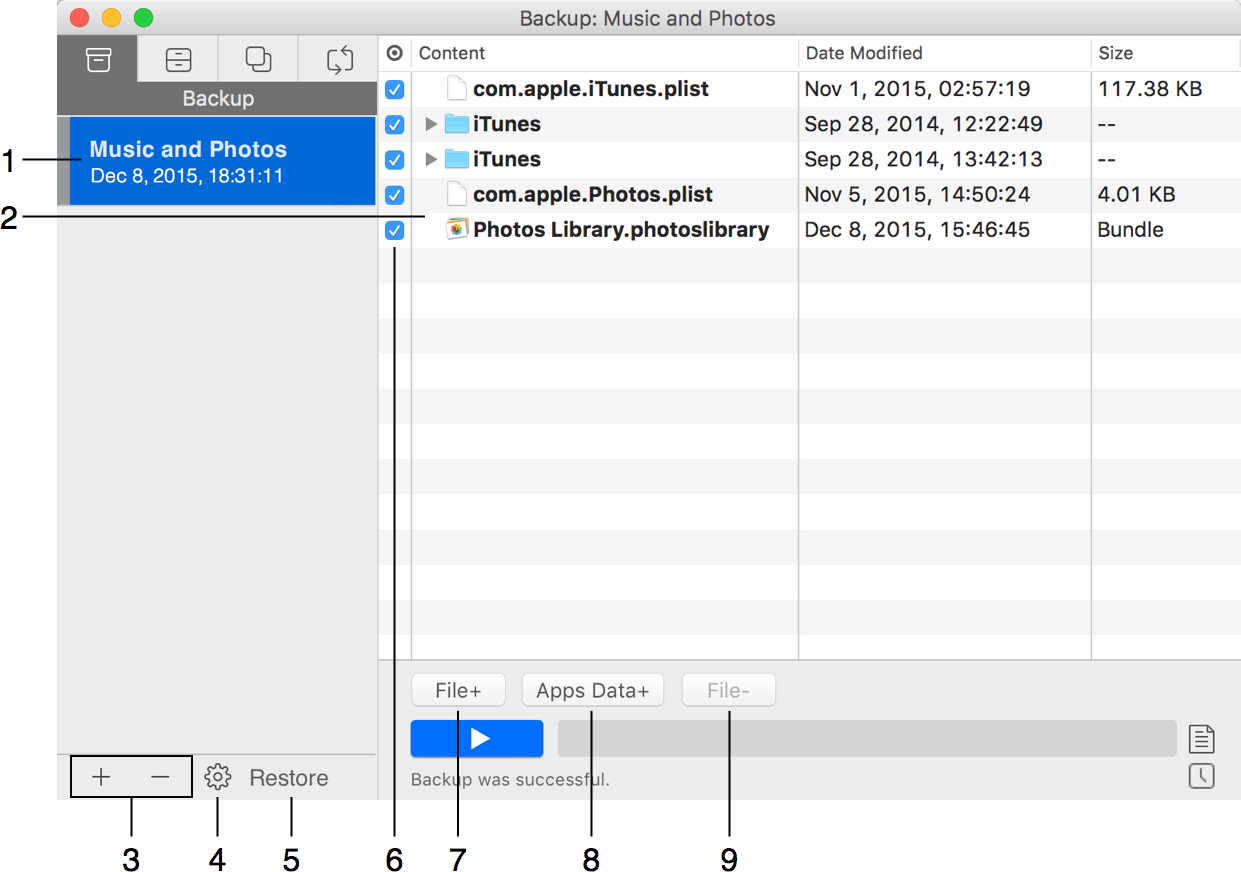
1 – List of backup projects. Along with the project name, there is the date and time of the most recent backup.
2 – List of files and folders included in the current project.
3 – Add or delete projects.
4 – Project properties.
5 – Open the Restore dialog to restore files from the backup.
6 – An option to exclude items from new backups without deleting them from the backup project. If you exclude a folder, all its content will be excluded too.
7 – Add a file or folder to the project.
8 – Add files to the project from a predesigned list. Each item in the list corresponds to user data such as contacts or a photo library.
9 – Remove a file or folder from the project. This button will actually delete top level items from the list, but it will exclude a subfolder or file inside a folder.