Working with Layers
The built-in editor of vector shapes lets you modify icons and shapes provided in the content library and create new vector images.
To open the vector editor, double-click on a shape or icon on the canvas. In this way, you can open an object in the editor and modify it. The vector editor also opens up when you create a custom shape.
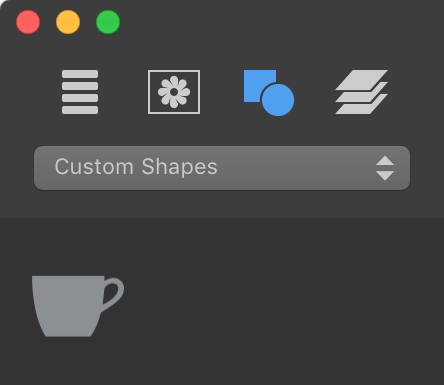
To create a custom shape, open the Shapes section in the Content panel and select Custom Shapes… in the drop-down menu. Then click the plus button at the bottom of the panel.
To add a shape from canvas to the Custom Shapes library, select this shape and click the plus button below the list of custom shapes. The vector editor will open. Then you can modify the shape, or click OK right away to add the shape with no changes.
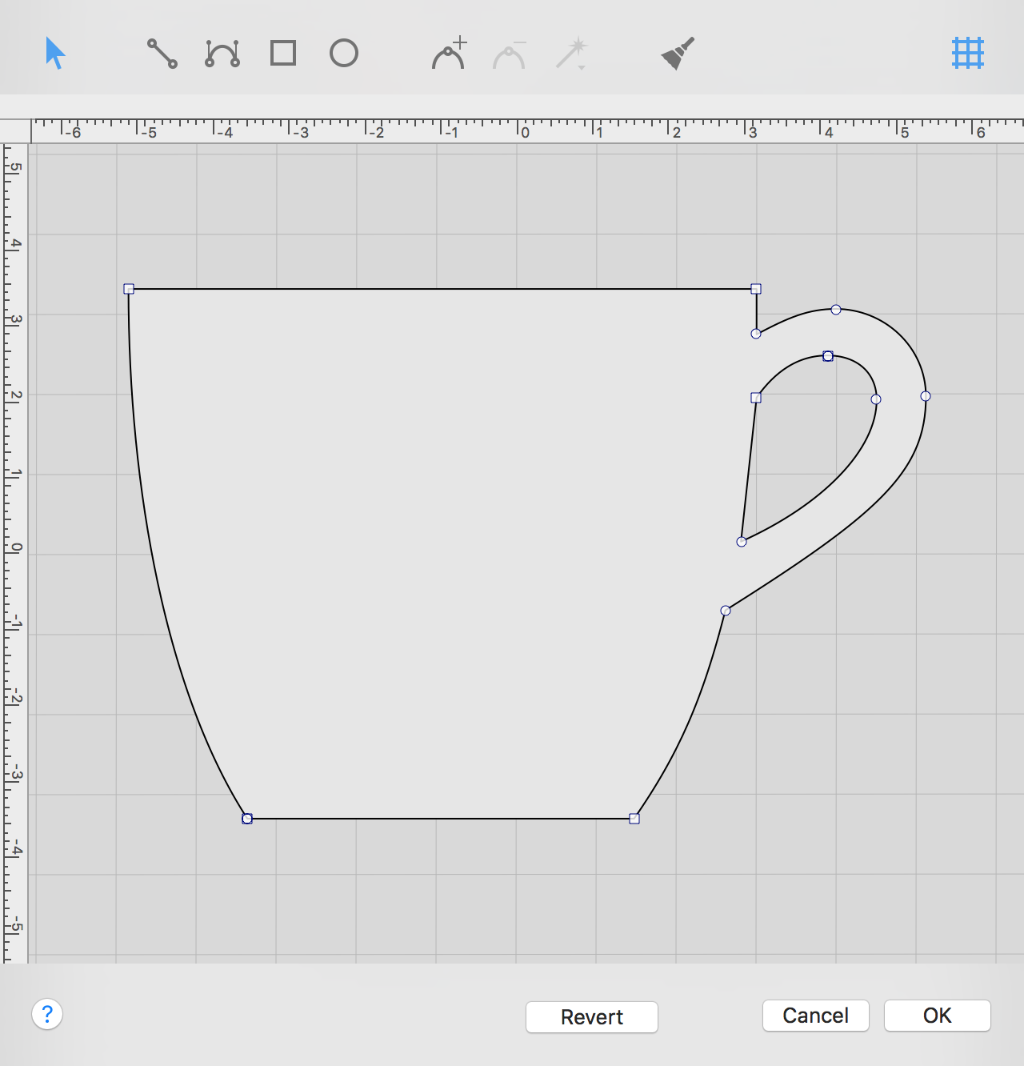
Tools in the vector editor:

1 – The selection tool is used to select or move points.
2 – The straight segment tool (Opt-L).
3 – The curved segment tool (Opt-C).
4 – The rectangle tool (Opt-R).
5 – The ellipse tool (Opt-O).
6 – Add an anchor point.
7 – Delete an anchor point.
8 – Change the anchor point type.
9 – Clear the canvas (Opt-Space).
10 – Show or hide the grid.
A vector shape comprises anchor points and lines that connect them. Anchor points mark the beginning and end of each line (or segment). By adding one line after another, you create a path. The path must be closed. This means that it begins and ends at the same point.
Anchor points can be of two types: corner point and smooth point. When you change the type of a point, adjoining lines may change from curved to straight and vice versa.
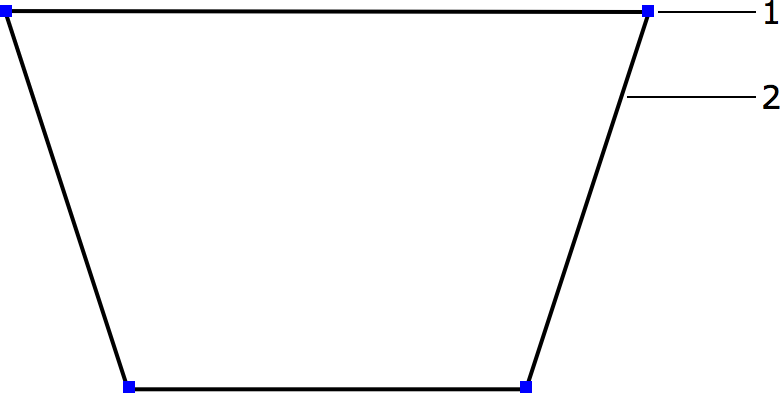
1 – Corner point. At a corner point, a path abruptly changes its direction. A corner point may join either straight or curved lines in any combination. A corner point with two straight lines doesn't have the direction lines.
2 – Straight segment.
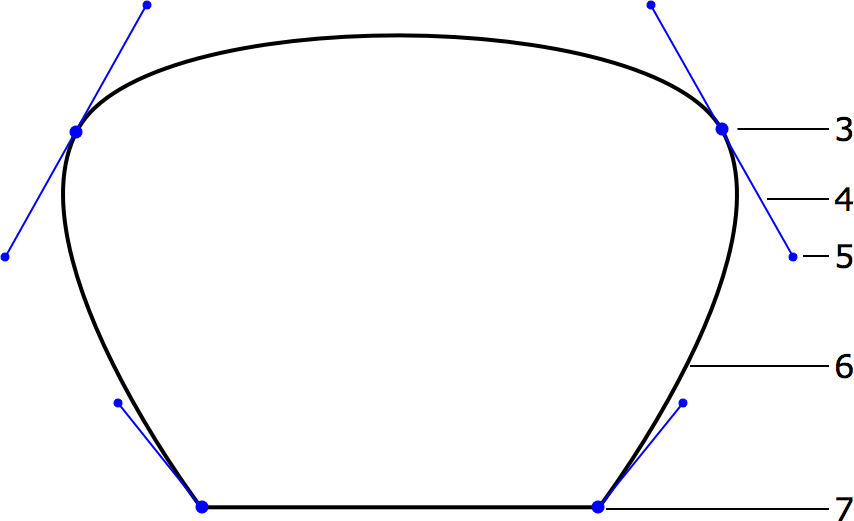
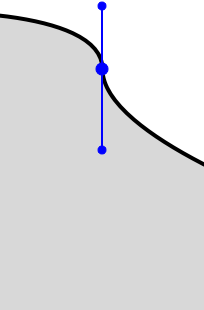
3 – Smooth point. At a smooth point, a path continues following the same direction. A smooth point joins only two curved segments.
4 – Direction line.
5 – Direction point. It is a handle on the end of a direction line. Moving a direction point, you can change the length and angle of the corresponding direction line.
6 – Curved segment.
7 – Corner point.
The direction of a curved path in a smooth anchor point coincides with the direction of the direction line. Leaving the anchor point, the path branches off from the direction line. The longer the direction line is, the longer the path that passes near it.
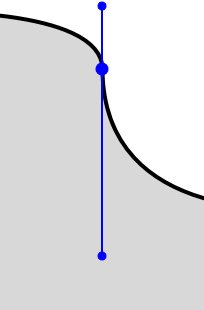
By default, the direction lines of the same smooth point rotate together preserving a 180 degree angle between them. By changing this angle, you can create a corner point from a smooth point. To do this, drag one of the direction points holding down the Shift key. To make two direction lines rotate together again, restore a 180 degree angle between them.
Select the straight segment ![]() or curved segment
or curved segment ![]() tool. Click on the canvas to add as many anchor points as you need. Make the last click on the first point of the path to make it closed. You can finish drawing by activating the selection tool. In this case, the program will close the path automatically.
tool. Click on the canvas to add as many anchor points as you need. Make the last click on the first point of the path to make it closed. You can finish drawing by activating the selection tool. In this case, the program will close the path automatically.
Images that you create here are solid shapes, not contours.
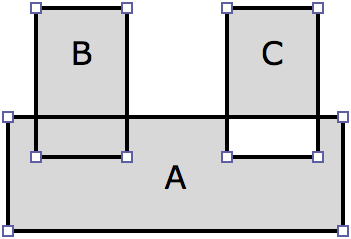
The direction that you draw a path matters when one shape has been drawn over another. In the picture below, shapes A and B were drawn in the clockwise direction. C was drawn in the counter-clockwise direction. The areas where the shapes overlap are different. The intersection area of A and B remains solid, while the intersection of A and C is a hole.
You add anchor points when you draw a path.
To add more anchor points, activate the adding tool ![]() and click on a path segment.
and click on a path segment.
To delete an anchor point, select it and click the delete button ![]() .
.
To choose a different type of anchor point, click the type button ![]() .
.
To move an anchor point, drag it with the mouse. A straight segment attached to this point will change its direction. A curved segment will change the direction and shape.
To switch off the smart guides and snap function when you move an anchor point, press and hold the Cmd key.